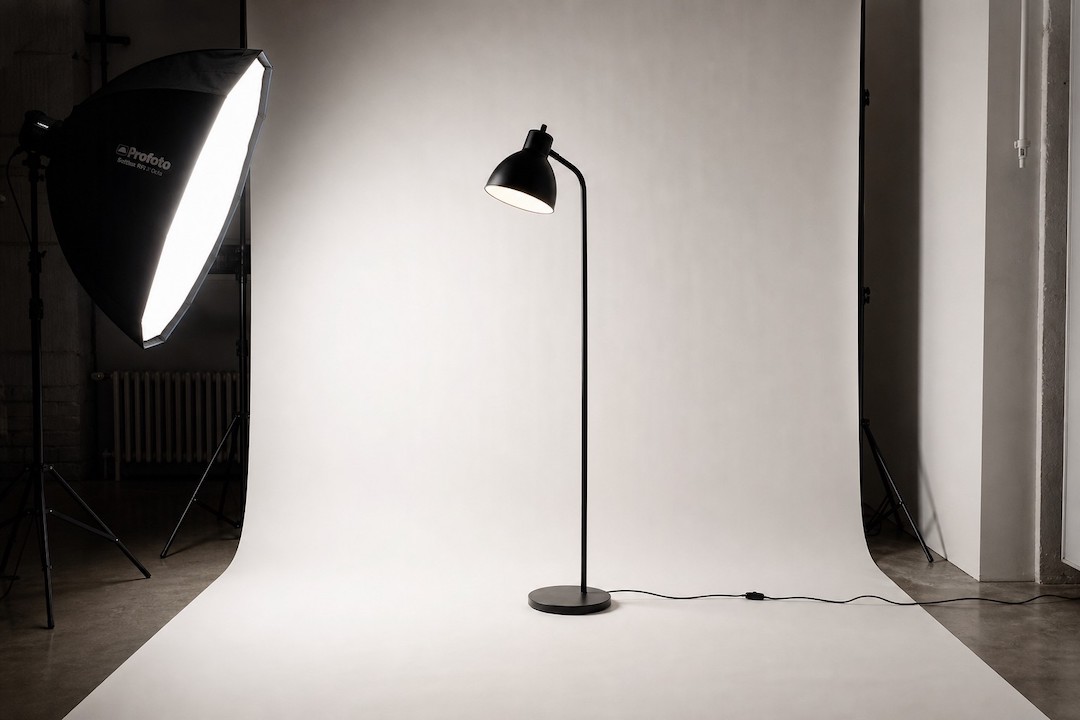
Thinking about getting that pro studio look for your photos, but feeling a bit overwhelmed by the gear? You’ve probably seen those sleek, well-lit shots and wondered how they’re made. Well, a big part of the secret often boils down to mastering a few key tools. And when it comes to creating stunning studio photography, two pieces of equipment often rise to the top for their versatility and quality of light: the softbox and a black floor lamp.
So, can you create stunning studio photography with just a softbox and a black floor lamp Lovefanli? Absolutely, yes. In fact, with the right approach, these two items can be incredibly powerful allies in achieving beautiful, controlled, and professional-looking images. It’s not about having the most gear; it’s about understanding how to use what you have effectively. This approach focuses on shaping light, creating mood, and making your subject shine without needing a whole warehouse of equipment. Let’s dive into how you can make this happen.
When you’re starting out in studio photography, or even if you’re a seasoned pro looking for a more streamlined approach, the combination of a softbox and a black floor lamp offers a surprising amount of creative potential. It’s the perfect pairing for photographers who want to achieve controlled, flattering light without a complex setup.
Why This Combination Works So Well
Think of it like this: the softbox is your primary light shaper, and the black floor lamp becomes your silent partner, controlling the negative space and adding depth to your images.
- Softbox: Your Light Sculptor: The beauty of a softbox lies in its ability to diffuse harsh light. Instead of a direct, pinpoint source of light that can create hard shadows and blown-out highlights, a softbox spreads the light over a larger surface area. This results in a softer, more forgiving illumination that’s flattering on most subjects, whether it’s a portrait, a product, or a still life. The larger the softbox relative to your subject, the softer the light will appear, wrapping gently around your subject and minimizing sharp transitions.
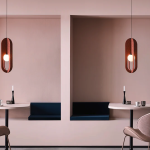
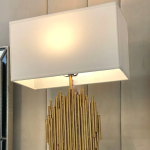
- Black Floor Lamp: The Shadow Weaver: Now, the “black floor lamp” might sound a bit unusual compared to a typical studio light. However, in this context, we’re primarily referring to a lamp that can act as an adjustable light modifier or a stand for other modifiers, and its black finish often implies a stealthy role. It’s not necessarily about the lamp itself emitting light, but rather how it’s used to control light. This could be a black flag (a large piece of black fabric or board) mounted on an arm, or it could be a lamp stand that you strategically place to cast shadows or to hold your softbox in a specific position. The key is its ability to absorb light and create areas of darkness, which are just as crucial as the illuminated areas in defining form and creating mood.
Beyond the Basics: The Synergistic Effect
The real magic happens when these two elements work together. The softbox provides the beautiful, controlled illumination, while the “black lamp” (acting as a modifier or stand) helps define the edges of that light, sculpt the shadows, and prevent unwanted reflections or light spill. This interplay allows you to move beyond flat, uninspired lighting and start creating images with dimension, atmosphere, and a true sense of depth.
Mastering the Softbox: More Than Just a Box
The softbox is arguably the most crucial component in achieving flattering studio light. It’s the workhorse that transforms harsh light into something beautiful and usable. Understanding its principles will elevate your photography.
Understanding Soft Light
The fundamental principle behind a softbox is diffusion.
- What is Diffusion? Diffusion means scattering light. A bare flash or continuous light source would create hard, defined shadows. A softbox, with its translucent front diffusion material, spreads that light out. This makes the light source appear larger to the subject, which in turn creates softer transitions between light and shadow. Think of a cloudy day versus a bright sunny day – the cloudy day provides soft, diffused light.
- Size Matters: The size of your softbox in relation to your subject is incredibly important. A small softbox close to your subject will still produce relatively hard light. A large softbox, even further away, will produce much softer light. For portraits, larger softboxes are generally preferred as they wrap around the face more pleasingly. For smaller products, you might use a smaller softbox or a stripbox.
Types of Softboxes and Their Uses
Not all softboxes are created equal. Different shapes and sizes lend themselves to different applications.
- Octagonal Softboxes: These are popular for portraits because their round shape creates pleasing catchlights (reflections in the eyes) that mimic natural light sources like the sun or a large window. They offer a very soft, elegant wrap of light.
- Rectangular Softboxes: These are versatile and great for broader illumination. They can be used for full-body portraits, fashion photography, or for lighting larger products where you need a more even spread of light.
- Strip Softboxes: These are long and narrow, making them excellent for edge lighting, creating highlights on products (like the shimmer on a bottle or the edge of a car), or for dramatic rim lighting on portraits to separate the subject from the background.
Positioning Your Softbox for Maximum Impact
Where you place your softbox is as important as the type you use.
- The “Rembrandt” Portrait: A classic technique where the light is positioned above and to the side of the subject, creating a small triangle of light on the shadowed cheek. This is achieved by angling the softbox downwards and off to the side.
- The “Loop” Portrait: Similar to Rembrandt, but the shadow of the nose only slightly curves downwards, creating a small loop. This requires a slightly less dramatic angle than Rembrandt lighting.
- Direct On-Camera (but diffused): While direct on-camera flash can be harsh, a softbox placed directly in front of the lens (or slightly above) creates very even, soft illumination. This is often used for product photography where you want to minimize shadows and showcase the object clearly.
- High Key Lighting: For a bright, airy look, position your softbox directly in front of and slightly above the subject, ensuring even light across the entire frame.
The Role of the Black Floor Lamp: Shaping the Darkness
When we talk about a “black floor lamp” in studio photography, we’re often not talking about a light source as much as we are about a tool for light control. This is where things get a bit more nuanced and creative.
More Than Just a Stand: Light Control Tools
The term “black floor lamp” can encompass a few different things in a studio context. It’s about using black to absorb light and define shadows.
- Black Flags and Gobos: These are essentially black panels that you position to block light from hitting certain areas of your subject or background. A black flag on an adjustable arm (often mounted on a light stand, which could be a “black floor lamp” in terms of its function) can be used to sculpt shadows, reduce reflections, or prevent light spill onto unwanted areas.
- Black Absorbers: Think of it as a sophisticated way to “paint with darkness.” By strategically placing black surfaces, you can control how light bounces and where shadows fall. This is crucial for adding dimension and depth to your images, preventing a flat, overexposed look.
- The “Dark Side” of the Studio: Sometimes, the “black floor lamp” might simply be a creatively positioned light stand with a black finish, used to hold a large black fabric panel (a “flag”) that acts as a light absorber. The key is its function: to manipulate the absence of light.
Techniques for Using Black to Your Advantage
The strategic placement of black elements can dramatically alter a photograph.
- Creating Dimension in Portraits: By using a black flag to darken one side of a subject’s face or body, you can create a more dramatic and sculpted look. This helps to define contours and add a sense of three-dimensionality.
- Controlling Product Reflections: For reflective products, unwanted highlights can be a nightmare. A carefully placed black flag can block out those harsh reflections, allowing you to control exactly where highlights appear.
- Deepening Backgrounds: If you have a light-colored background that’s getting too much spill from your main light, using black absorbers behind or around your subject can help to push the background into darkness, making your subject pop.
- Subtle Shadow Sculpting: Even a small black card placed strategically can subtly alter the shadow shape, leading the viewer’s eye and enhancing the form of your subject. It’s about the interplay between light and shadow.
Combining Your Softbox and Black Lamp for Stunning Results
Now, let’s bring it all together. The true power of this setup comes from the synergy between your softbox and your light-controlling “black lamp.”
Creating Depth and Dimension
This is where you move beyond a simple illuminated subject.
- The Main Light: Your softbox will serve as your primary light source. It’s providing the beautifully diffused illumination that your subject needs. The size and placement of this softbox will determine the overall mood – softer and broader for a gentle look, or more focused and angled for drama.
- The Fill Light (or Lack Thereof): Here’s where the “black lamp” plays a crucial role. Instead of always adding a second, weaker light (a fill light) to soften shadows, you can use your black flag or absorber to control how dark those shadows become. This allows you to maintain more contrast and depth in your image. If the shadows from your softbox are too harsh, you might position a black flag in a way that reduces the amount of ambient light bouncing into them.
- Edge Lighting and Separation: Use a strip softbox on one side to create a beautiful edge light, and then use your black flag on the opposite side to ensure that side of the subject remains relatively darker, enhancing the separation from the background.
Crafting Mood and Atmosphere
The interplay of light and shadow is key to setting the tone of your photograph.
- Dramatic Noir: For a moody, cinematic look, position your softbox from a high angle, creating strong shadows. Then, use your black flag to further deepen those shadows, leaving only key areas illuminated.
- Subtle and Ethereal: For a softer, more diffused look, use a larger softbox positioned relatively flatly. Then, use your black flag judiciously to subtly shape the fall-off of light, preventing any harshness and creating a gentle, airy feel.
- Product Focus: For product shots, you might use a softbox to evenly illuminate the product, and then strategically place black flags to control reflections and add subtle shadows that define the product’s form. This prevents a uniformly bright, flat-looking product.
Practical Tips for Success
Getting the most out of your softbox and black floor lamp setup requires a little practice and attention to detail.
Experimentation is Key
Don’t be afraid to move things around.
- Small Adjustments, Big Impact: Even a few inches of movement for your softbox or black flag can dramatically alter the light and shadows. Get comfortable with making these small, incremental changes and observing the results.
- Test Shots are Your Friend: Take plenty of test shots. Look at them critically on a larger screen if possible, paying attention to how the light falls, where the shadows are, and what emotions the lighting evokes.
- Shoot in Manual Mode: This gives you complete control over your exposure. You can then adjust your aperture, shutter speed, and ISO to achieve the desired brightness and depth of field, allowing the lighting to be the primary creative element.
Understanding Light Metering
Knowing how your camera meters light will help you achieve your desired exposure.
- Metering for the Highlights: If you’re aiming for a more dramatic look with deep shadows, meter your shot so that the brightly lit areas are correctly exposed. This will naturally lead to darker shadows.
- Metering for the Mid-Tones: For a more balanced look, meter off a mid-tone area of your subject. Your softbox will likely be providing enough light to illuminate the subject well, and your black flag will help retain some shadow detail.
- The Importance of the Histogram: Learn to read your histogram. It’s a visual representation of the tonal distribution in your image. A well-balanced histogram for this type of lighting often has information on both the left (shadows) and right (highlights) sides, with a good amount in the middle.
Post-Processing: The Finishing Touch
While great lighting is crucial, a little post-processing can elevate your images further.
- Shadow and Highlight Adjustments: Even with careful lighting, you might need to subtly adjust shadows and highlights in editing software. You can deepen shadows where needed or gently lift them to reveal detail without losing the mood.
- Contrast and Clarity: Enhancing contrast can make your lit areas pop and your shadows recede. Clarity can add definition to your subject, but use it sparingly to avoid an over-processed look.
- Color Grading: Use color grading to further enhance the mood and atmosphere you’ve created with your lighting. Warm tones can create a cozy feel, while cooler tones can evoke a sense of drama or sophistication.
By mastering the interplay between your softbox and your “black lamp” approach to light control, you have the tools to create truly stunning studio photography. It’s about understanding how to sculpt with light and shadow, and these two elements, used intelligently, are more than enough to achieve professional and captivating results. The journey is in the learning and the experimenting, so get out there and start shooting!